Hand-painted textures for games - Krita rules!
Page 1 of 1 (2 posts)
Tags:
None
|
Registered Member 
|
Hi all!
I just felt like supporting this awesome program and made a little tutorial about hand painting a wall image within less than an hour, ready to use in your favorite 3D Application. I am still quite new to Krita, so please - if I missed out on some tools or more suitable brushes/settings - let me know! So, without further ado, here is my writeup: Today we will be making a hand-painted wall texture, using a couple of Krita's general brushes. We will be painting in values only, which means we end up with a black and white painting of the texture. The reason is versatility. You can overlay this texture with a color layer or even with photographic reference to achieve different looks, later on. Here is, how we start: 1. Open Krita 2. From the Document Templates, choose "Texture Template" chose "Texture 2k 16bit scalar"; pick double the texture size you aim for, because by reducing image size you get an effect of sharpening your texture. 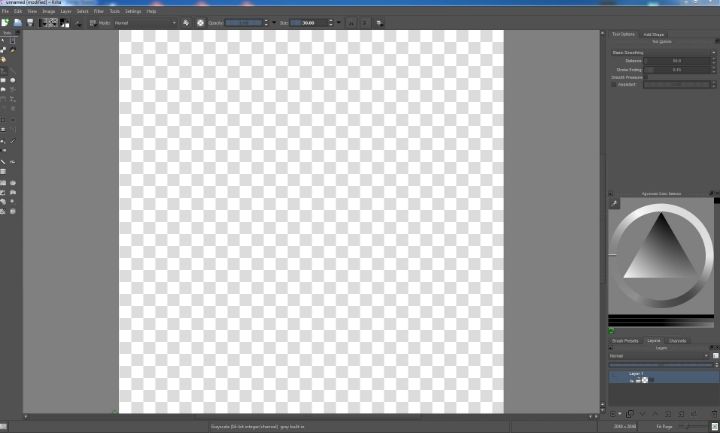 3. Use the fill or flood tool to create a base color. I prefer a neutral, light grey to start with, because the contrast will be less harsh than with a plain white background. 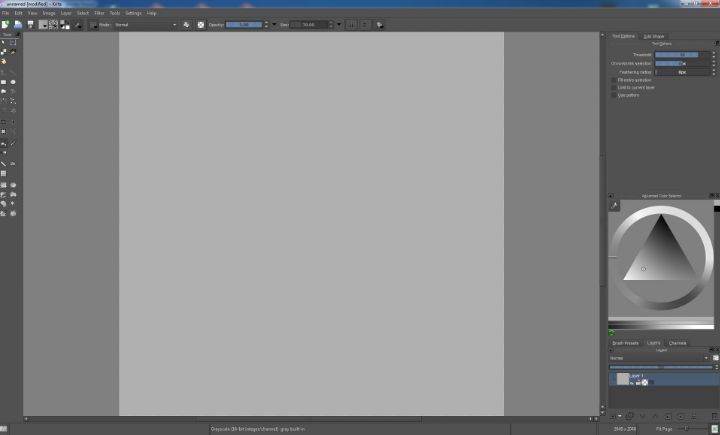 4. Create a new (empty) layer. Set horizontal mirror mode to "on" and paint in some dark grey strokes. 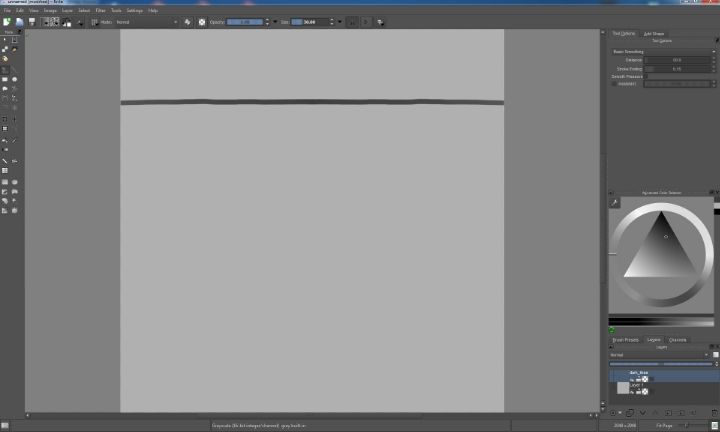 5. Transform (ctrl-t) the layer to make sure the future bricks will be seamless. 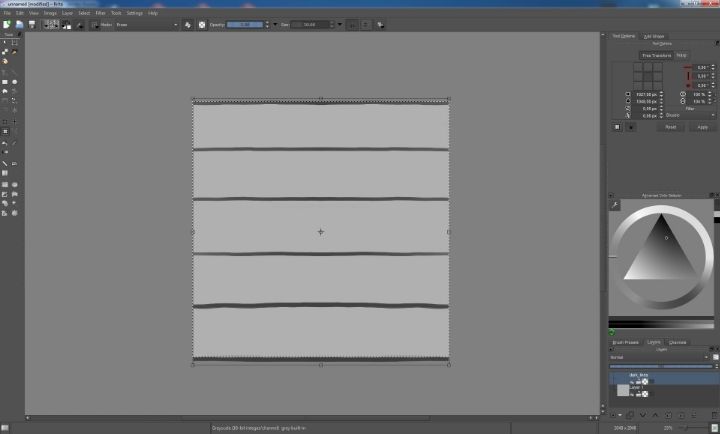 6. Turn off mirroring or use it for the strokes on top and bottom, but otherwise paint in your "bricks" without symmetry. 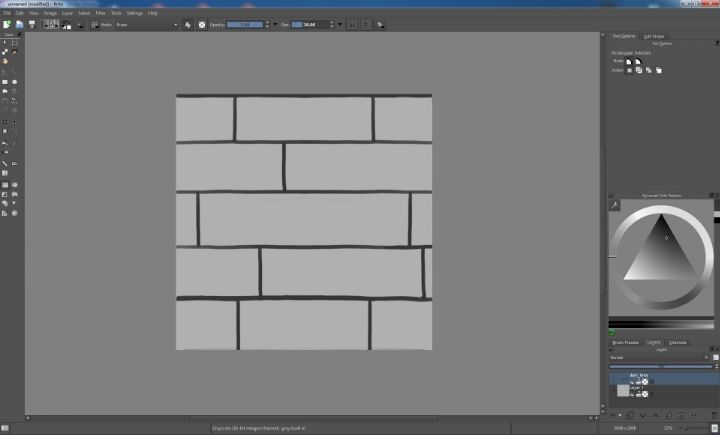 7. Change the layer blending mode to "multiply" and put it on top or create two more layers below it. Call the bottom layer "gradient", call the one above "highlight". Now go painting in the first (gradient) layer by starting with a darker grey; go "brick-by-brick" and paint with a rather small to medium sized brush. Use an opacity between 80-90%. 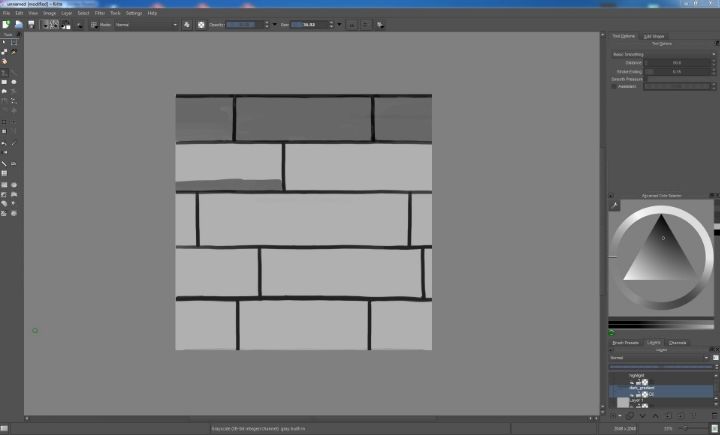 8. Once the first pass is done, do another one to factor in some gradient. Use a bigger brushsize for this. (If you are unsure about painting on top of your established base, just make another layer above your current "gradient" one; merge them when you are done.) 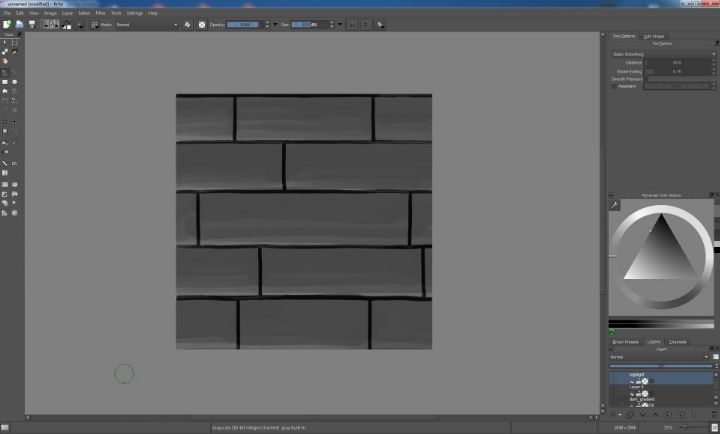 9. Now go to your top layer, select a brighter grey and start painting in the highlights. (At this point I realized I would have some insanely large bricks on my tiling pattern, so I changed the topmost layer with the dark lines on them to get better proportions.) 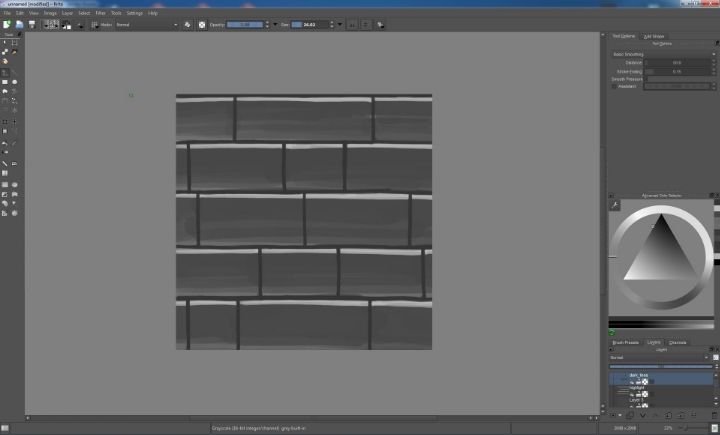 10. Merge your dark gradient and highlight layer to even out the values a bit more. You want to "equalize" the surface, so the gradient on the surface is more hinted at than entirely visible. It subtly sculpts the shape. Pick color/value directly from the gradient layer and again work brick-by-brick to wash out the borders of the gradient. Krita will help you greatly, since the brushes and pressure sensitivty combined give a very organic and natural feel to the surface. Loosen the highlights a little bit, too. 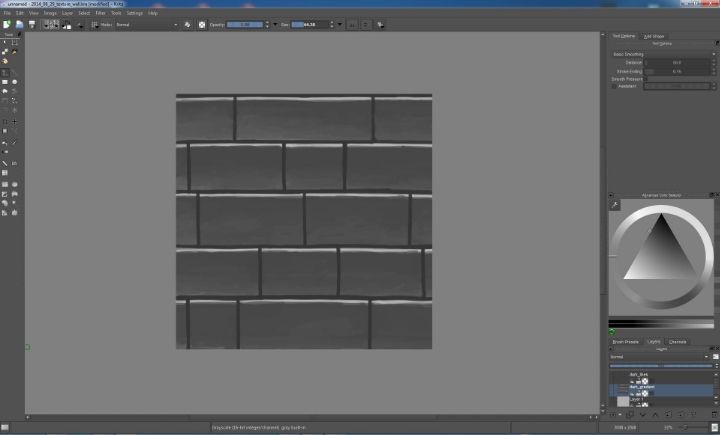 11. Now it is time to add some depth again, so we will start darkening our cracks between the bricks. Use a smaller brush and select a dark grey color. I made this layer on top of everything to be able to enhance the brick shape and figure out where to put chips in the surface. *remember to add some shadow and highlight to the chipped out parts, too!* 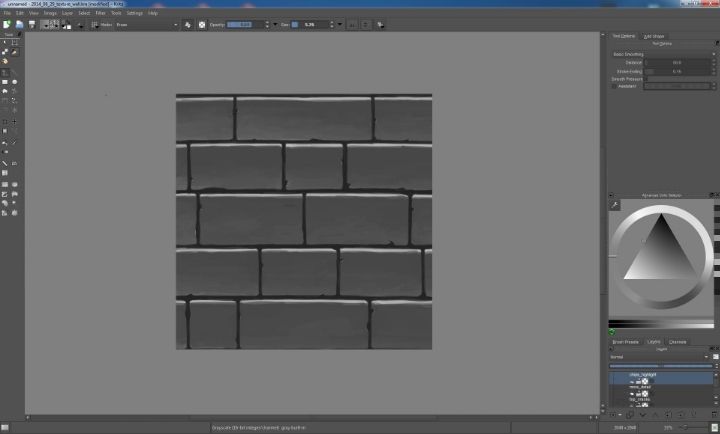 12. Next I made a layer called "More Detail", which is just one dark line (first) and then another bright line painted on top of it, as highlight. You are pretty free in defining your detail here. I just chose lines as something easy to do, but you are welcome to try all other kind of final detail, just don't make it too noisy or repetitive. 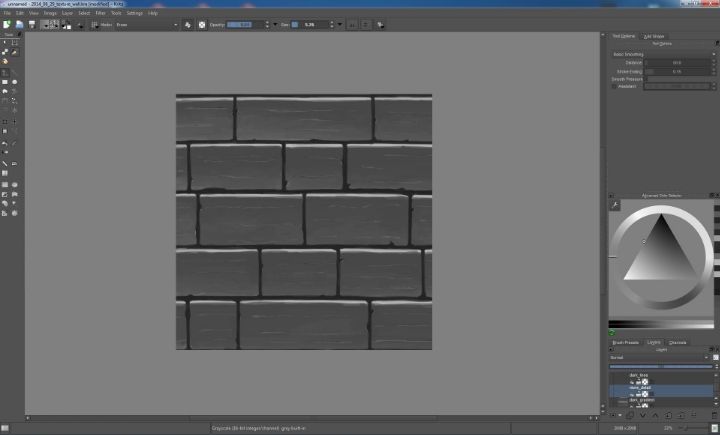 13. Now we use a filter on the "More Detail" layer. I used (Filters ->) "Map" with the number of tiles at "5". Erase the detail that is too large or looks wrong. *sorry, I overwrote this image and it is lost. Basically what the "map" filter did was reduce the amount of detail in my "scratches"; play around with it, you'll see.* 14. Congratulations, you are done with your first Krita-handpainted Texture! Now there are only a few things left to do, such as previewing the texture. I use Ndo to make a quick normal map and 3Do to preview my results. The Quixel Suite I use to preview my work is currently in free beta (until Sep 2014)! Here is the screenshot from the 3Do previewer: 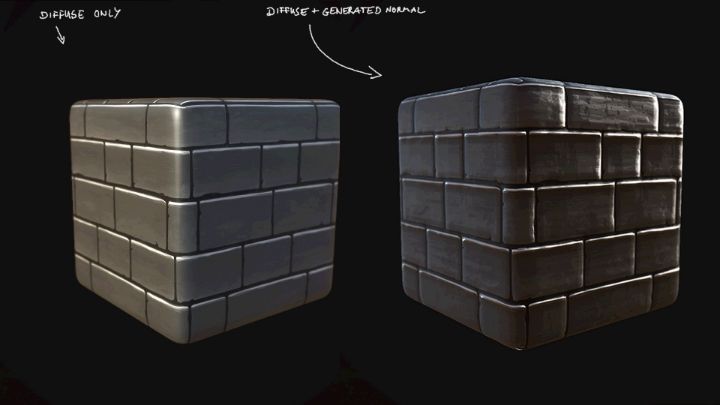 I did use Photoshop to generate the photo-normal from the texture, because Krita doesn't work with Ndo (yet!). This is my final result after creating a specular map aswell, adding contrast to the diffuse and overlaying with a dirt (texture) and color: 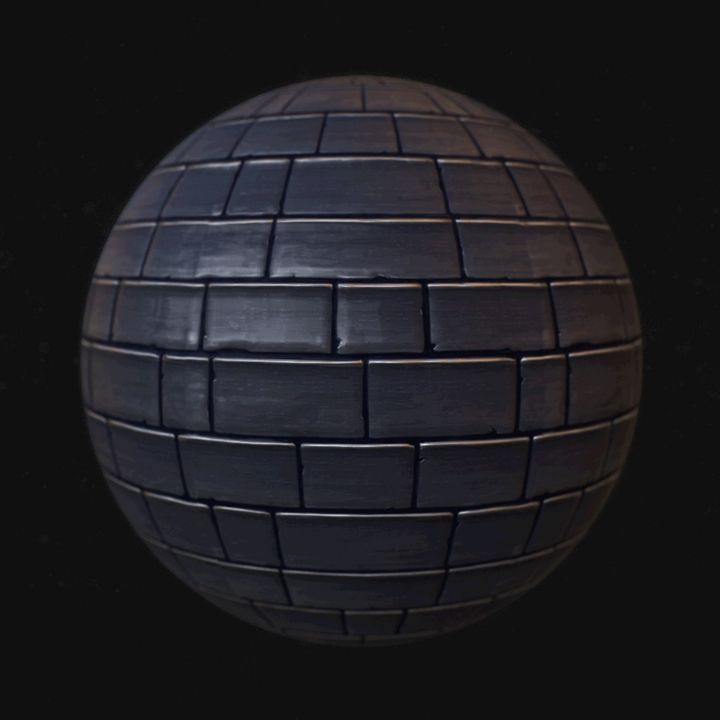
|
|
Registered Member 
|
Thank you very much for this wonderful explanation. And I think is useful in the manufacture of Flash Games and games in general, and also 3d forms
|
Page 1 of 1 (2 posts)
Bookmarks
Who is online
Registered users: Bing [Bot], daret, Google [Bot], sandyvee, Sogou [Bot]


